This tutrial is written by me using PSP 10 and Animation Shop 3
Any similarities to other tutorials is purely coincidental and unintentional.
All materials and tubes used are copyright to their respective owners.
Any similarities to other tutorials is purely coincidental and unintentional.
All materials and tubes used are copyright to their respective owners.
Supplies
Wordart here
Licensed artist work is by Jennifer Janesko
Plugins used
Toadies - Ommadawn
Toadies - Ommadawn
Alien skin Eye candy 5 Impact - gradient glow
Alien Skins Xenofex 2 - constellation
Alien Skins Xenofex 2 - constellation
Font of choise, I've used Ekaterina Velikaya One
Lets start
Open a new canvas 700x500 flood fill white
Add paper 3 as a new layer, add the mask and merge group
Adjust - blur - blur, then add Toadies - Ommadawn
with settings 12, 16, 234, 17.
Add frame 2 and fill in the tubes you want in each frame,
give the tubes a drop shadow (0,-3,50,5)
then add papers inside the frames behind them if your images don't fill ut up.
Use the magic wand and click on one of the black lines on the mask
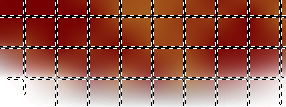
so your selection looks like this
then add papers inside the frames behind them if your images don't fill ut up.
Use the magic wand and click on one of the black lines on the mask
so your selection looks like this

duplicate the masked layer twice and add
Xenofex 2 - constellation - choose small star constellation under Settings
and just hook the line that says Make selection transparent
Just change the Random Seed button for the other 2 layers, and hide
Xenofex 2 - constellation - choose small star constellation under Settings
and just hook the line that says Make selection transparent
Just change the Random Seed button for the other 2 layers, and hide
2 of the layers.
Decorate as you'd like ;)
My name and the wordart has a tiny gradient glow.
Don't forget the proper ©
Merge visible when you're done and copy to Ani Shop 3
undo the merge and close the mask layer, open the next layer and
merge visible again, copy and paste after current in Ani shop
do the same with the last mask layer.
view animation and save it.
And you're done!
Hope you've enjoyed it.
If you have any questions don't be affraid to ask them in a comment below
or if you just wanna show it off, please do so and I'll add them to the show off on the side ;)
Tutorials are © Tutorials by Vaybs
And you're done!
Hope you've enjoyed it.
If you have any questions don't be affraid to ask them in a comment below
or if you just wanna show it off, please do so and I'll add them to the show off on the side ;)
Tutorials are © Tutorials by Vaybs


No comments:
Post a Comment