This tutrial is written by me using PSP 10 and Animation Shop 3
Any similarities to other tutorials is purely coincidental and unintentional.
All materials and tubes used are copyright to their respective owners.
Supplies
Download here
You find more of my Halloween Masks in Here
I'm using the artwork of © Jasmine Becket-Griffith
To use it you gotta purchase a license through CILM here
Plugins used
Alien Skin Eye Candy 5; Nature
Alien Skin Xenofex 2
Alien Skin Eye Candy 5: Impact
Let's start!!
Open a new canvas 600x500, flood fill it white.
Open the tube you wanna use and pick a dark color from it, for your mask.
Add a new raster layer and fill it with your color
(I've used a very dark green from my tube)
Open my mask. Go to Layers - New Mask Layer - From Image and choose vaybs mask hw 01
in the Source window. Merge group.
Duplicate it twice, and use the magic wand at these settings

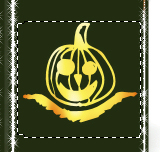
to select inside all the 3 white frames like this while holding down the Shift key

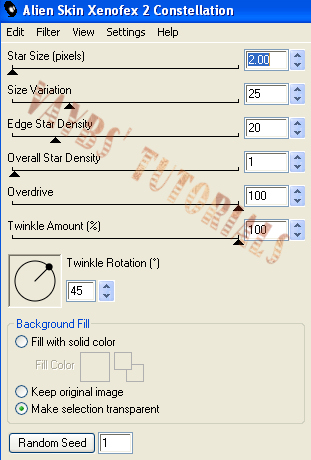
Add Alien Skin Xenofex 2 Constellation - Bling Bling at these settings

to all 3 layers just hitting the Random Seed button on the other 2.
Now lets add flames behind the pumpkins.
Use the Selection tool and make a selection like this below both the pumpkins.

Add 3 new raster layers under the pumpkins.
Add Alien Skin Eye Candy 5; Nature - Fire, at Default settings.
Add it to all 3 raster layers hitting the Random Seed button on the next 2.
Deselect And make a new selection around both pumpkins like this

Selections - Invert
Then hit delete in the 3 flame layers to get rid of the redundant flames. Deselect.
Add your tube, resize to fit the frame. Remember the proper © info.
Open the KR_Perfect_Pumpkin font and the 171RR pattern
Then choose the Text tool and find the font. hit the backgroundcolor to find
the pattern in patterns.
I've given the name a subtle glow using Alien Skin Eye Candy 5: Impact - Gradient glow
Settings : Subtle White Glow
Basics: I changed the color to a yellow from the flames and lowered the opacity like this

Now we're ready to animate.
Close 2 of the flame layers and 2 of the mask layers.
Merge visible and copy
Open Animation Shop 3 and paste as new animation.
Undo in psp, and open the next flame and mask layer closing the ones you've used.
Merge visible again and copy. Paste after current in Ani Shop 3.
Do the same to the 3 layers in PSP.
Select all frames and change frame properties to 20.
And you're done!!
Thanks for trying it out, and hope you've had fun!!
I'd love to see what you've made of this.
Tutorials are © Tutorials by Vaybs
All rights reserved
Thanks for trying it out, and hope you've had fun!!
I'd love to see what you've made of this.
Tutorials are © Tutorials by Vaybs
All rights reserved


Thank you! Your blog post will be advertised on the DigiFree Digital Scrapbooking Freebie search engine today (look for timestamp: 27 Oct [LA 07:00pm, NY 09:00pm] - 28 Oct [UK 02:00am, OZ 01:00pm] ).
ReplyDelete